Given n8n's popularity, we have a lot of our tutorials for automations on that platform. I mentioned in a different article the differences between Make and n8n come down to what you're looking for. If you're looking for structured automation with AI add-ons, then a solution like Make is a good pick. If you're looking for more of an agent-like intelligence, n8n can be a better pick.
That said, the reason we're putting this together is to make our existing automation posts easier. On one side, if you already are using automation, then it cuts down the time it takes each article to get what you're looking for. And on the other, going into a deeper dive on how to create your make account does warrant some further attention.
If you're looking for setting up your Make account, we have a similar explanation here.
Since we're not looking at the free self-hosted version here, we're looking at three options for n8n Cloud. There is a free trial for the different Cloud options, but monthly billing it's pretty straight forward.


Executions are the times the flows go through one runtime. If you have 50 steps, that's one execution. If you have a simpler automation with three steps, that's one execution.
One thing to note. There is a free version of n8n, but it requires work and experience setting up the self-hosted version (that's not the $800 per month business package).
Creating your n8n account
I'm going to start a free trial for Starter, at $24 per month. Fill out the signup form, you don't need a credit card to start. After that, you'll need to fill out some questions.


Lets start making an AI agent
We're going to do something similar to the Make automation we made, which is a check sheets, translate, paste in sheets flow. Lets start from scratch:

Step 1 - Add your first step
When clicking start from scratch, you'll see a blank workflow space, where you can start by adding a first step. You can move around in the space by hitting CTRL + left click, with the mouse scroll letting you zoom in and out.
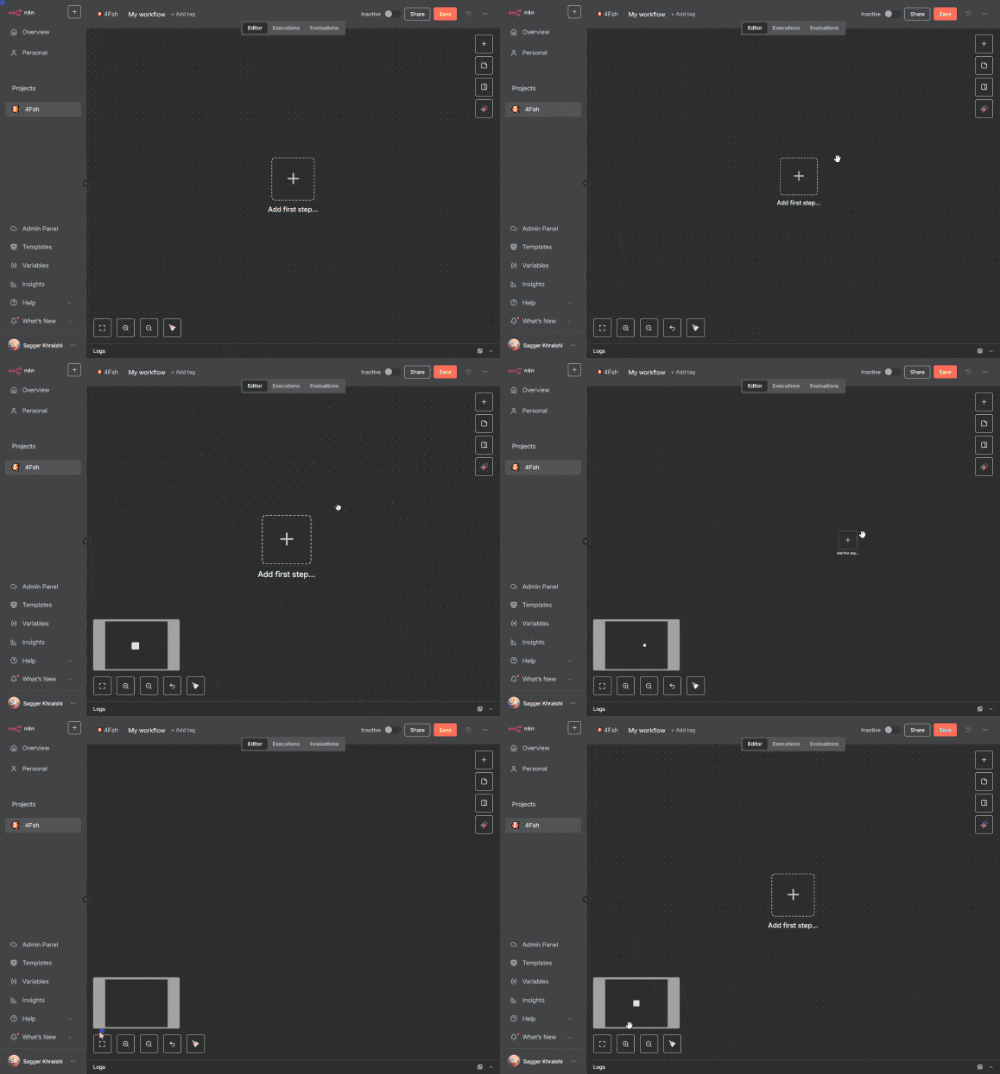
Lets click on 'Add a first step', and lets set this as 'Trigger manually'. What that does is it runs the flow when we click a button in n8n, which is helpful.
There's other options, like 'On chat message' if you're creating an AI chatbot. Or 'On a schedule' so it runs daily. There can be multiple triggers for a flow, so if you wanted to create something that triggers based on another workflow or if you ask it directly, you can do that.
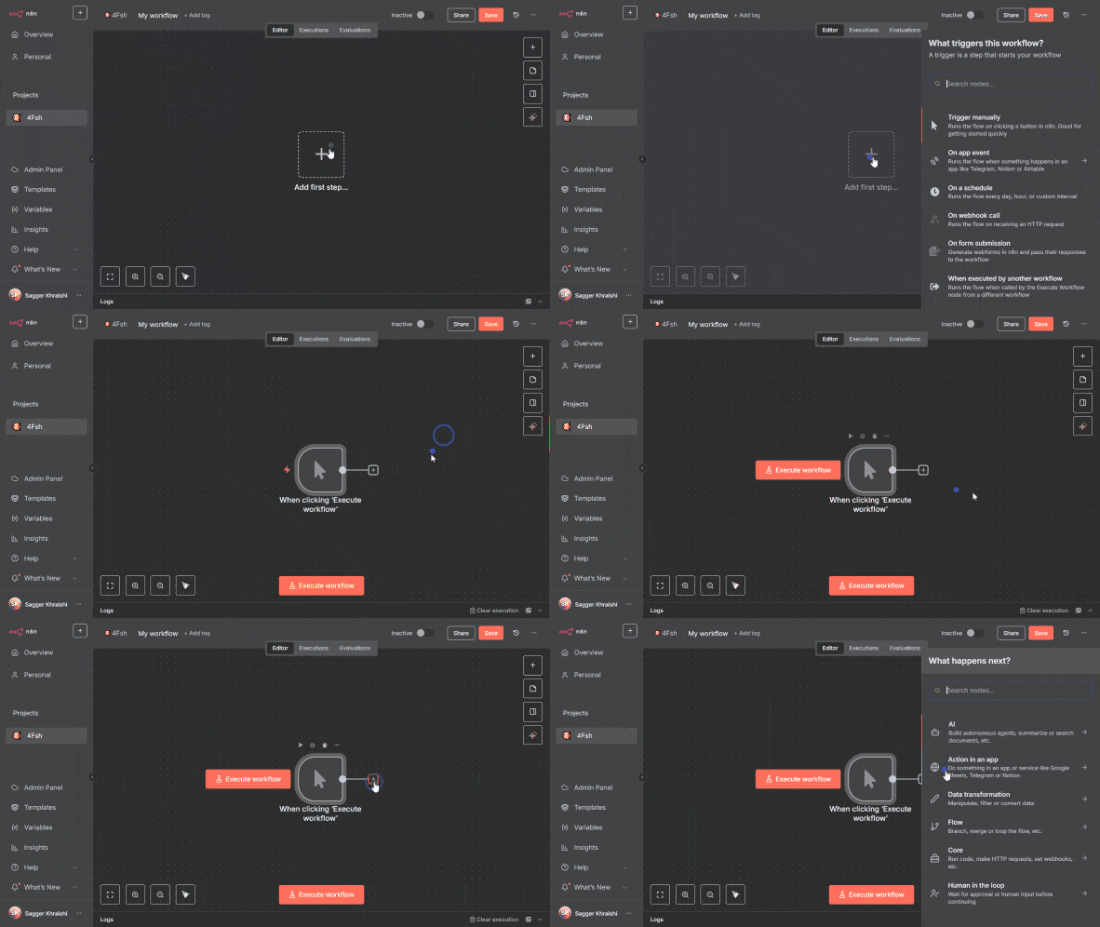
Great, now you have your first step. Lets click on the '+' icon to add the next step.
Step 2 - Sheets / AKA first action
Actions are things that need to be triggered by another node, for example with a schedule or button click. Since we don't need to worry about how many steps we are taking with n8n, that's not a concern for now. But with more steps, the more possible mistakes and errors can pop up, so it's something to keep in mind.
We'll be selecting 'Action in an app', in our flow it's supposed to check Google Sheets and pull data from it, send it to an AI tool, and put the output back in Google Sheets.
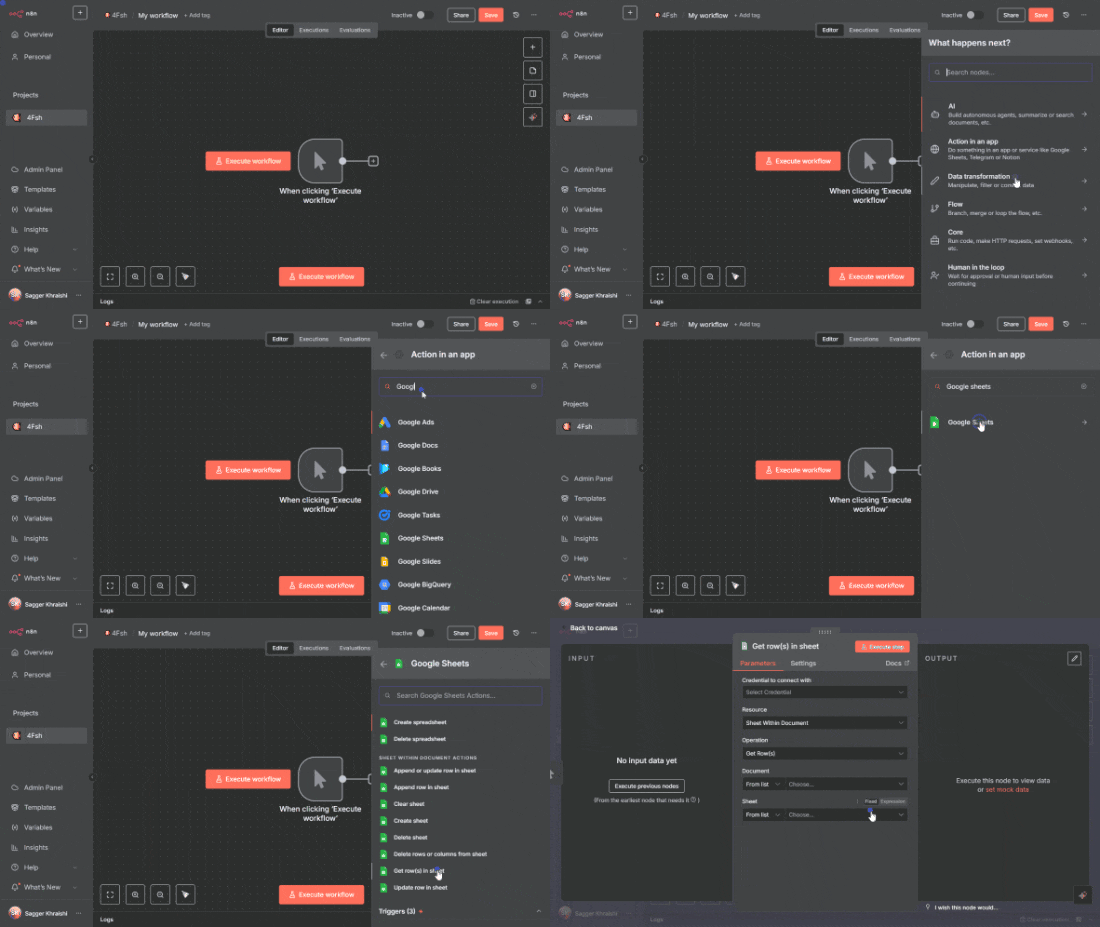
Under 'Search nodes', search for Google sheets and click it. That'll pop up with the actions we want to choose from. I'm going to choose 'Get row(s) in sheet', since we're looking at pulling data from the row. That would give us the next step, of...
Step 3 - Adding our first credentials

Since this is the first time, we'll need to select the credentials we're connecting here. Since this is the Cloud version of n8n, it's easier for us to connect just by signing in with Google. If you're doing the self-hosted version, this step is going to be compounded by several more.
Sign in with your Google account here. For the sheet we're doing as an example, create a 'Demo example' sheet for your own testing.

I put down the date as 8/24/2025, and under feedback, I put in something from Google translate. If you don't know another language (to be fair I don't know Chinese), just translate something from English and paste it there.
Underneath options, we're going to specify that the header row for column names is row 1. The first data row is row 2. But your node should look like this:

Step 4 - Getting our data and pinning it down
Hit execute step, which will give out the output - pulling the data from the sheet.

You can check the output data in three different ways. We have 'Schema', which if you're coming to n8n from Zapier or Make you should be already familiar with. There's a nice little table format, and there is also a JSON format.


Lets go back to the flow screen and try clicking execute workflow to test it out again. It should run, but we'll check the log at the bottom, and then pin the data. You can pin by rolling your mouse over the module, clicking the three dots, and then clicking pin.
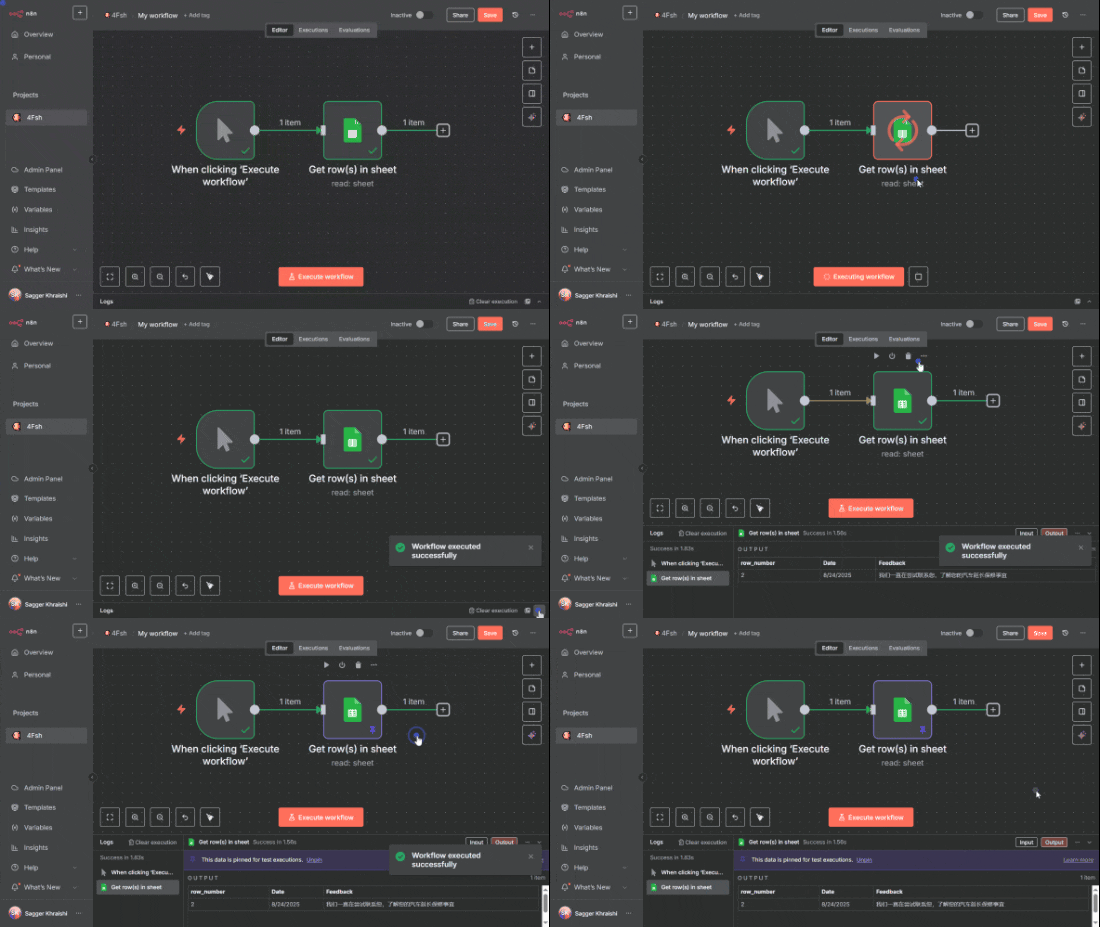
Step 5 - Adding AI
Lets click the '+' button for the next step. We'll be adding ChatGPT here, so just like earlier click 'Action in an app' or click 'AI'.
- If you click 'Action in an app', type ChatGPT and you'll get OpenAI as an option. Select that, then select 'Message a model' which will pop the credentials screen.
- If you clicked on 'AI', select your AI of choice like OpenAI, then select 'Message a model' which will pop the credentials screen.
You can connect this to external tools, so if you're running Ollama on your computer, you can connect to your personal AI model. But for this, lets just stick to ChatGPT.
We can see the input on the left side, which is the steps taken up till now. In the center, we can see the parameters and settings, and on the right side we can see the output.

That said, create your connection by selecting under Credential to connect with '+ Create new credential', which will pop the following screen up. Paste in your API key there then hit save.

Great, now you have your AI of choice with n8n. Lets add the following prompt:
The {{$json.Feedback}} came from dragging the schema from the left side that we want translated - 'Feedback' into the prompt box itself. We can also see the result of the prompt below, which is useful.

Execute the step. You will see the output on the right side, so in this case, we have the translation under the message as "We have been trying to contact you regarding your vehicle extended warranty'
Lets pin this too, so we don't keep wasting credits trying to test it out.

Step 6 - Updating sheets
You should now see the following workflow. Every time the workflow is executed, we get the row in the sheet and we send it to AI to get translated. But we need to put that information somewhere.

Underneath the model we have access to tools, which can be a HTTP request, or another workflow, or connecting with a MCP server. Instead, we need to click on the green line to the right for the next step in the node.
So click the '+' box to the right, and select 'Action in an app', so we can open up Google Sheets. Underneath, lets select 'Update row in sheet', so we can move our translated data to the sheet.
Going to select here the document, which in our case is Demo example, and the sheet, being Sheet1. And under values to update, we'll drag and drop the content from OpenAI as {{ $json.message.content }}. Under 'Column to match on', we'll select 'row number' and choose the row number in the schema input to the left. That's it.

Now lets go back to the canvas and execute the workflow.
Step 7 - Executing the flow

It worked. Let's check the sheet to see if the translation went through:

Great. You've made your first n8n automation. Now we can move on to the harder stuff.
We have our own n8n automations tailored for professionals on our site. You can also find n8n tutorials on YouTube, the n8n website, or on different community forums. Have fun!

